
Why a Deep Clean After Renovation Matters
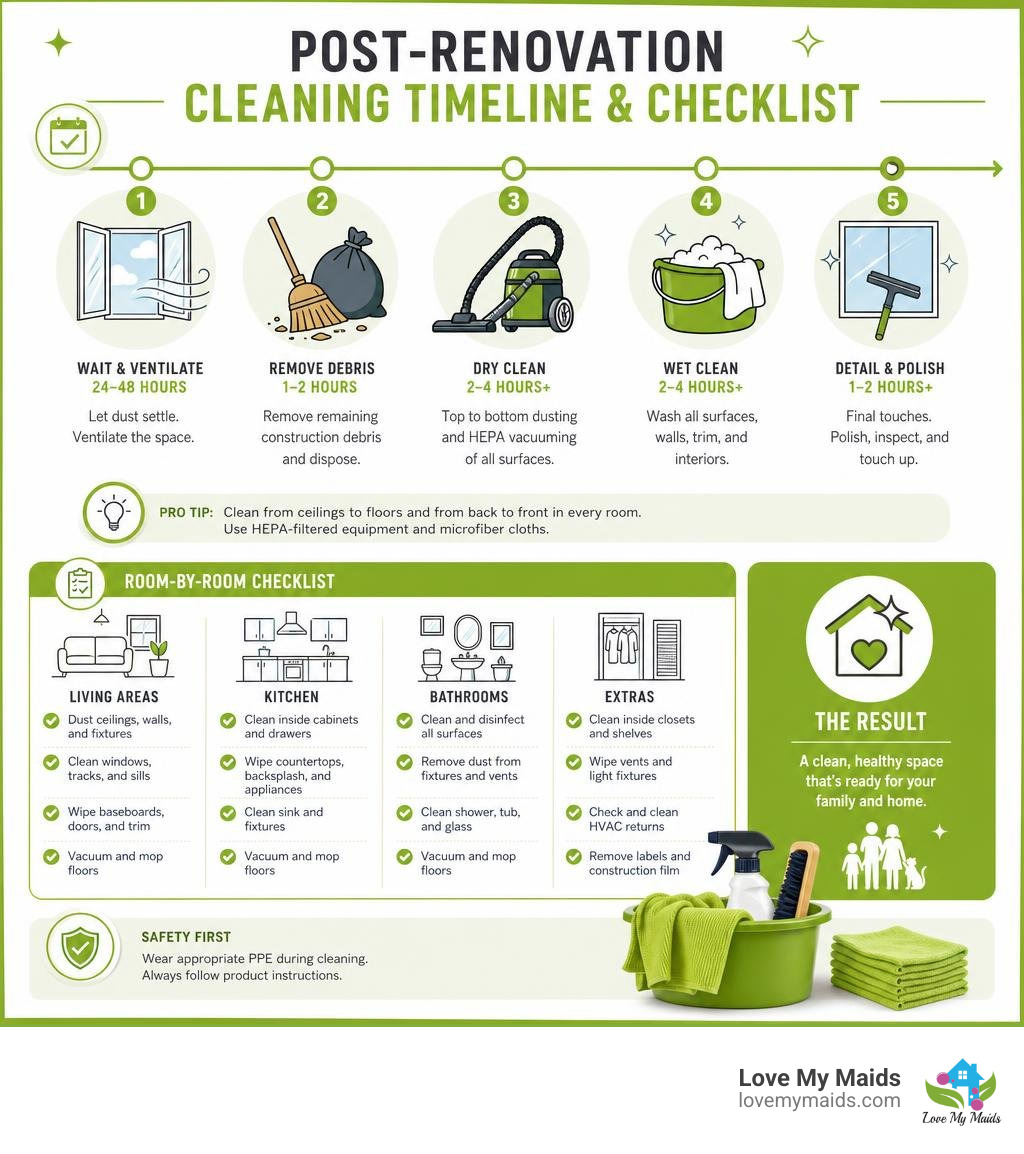
A deep clean after renovation removes the fine dust, debris, and residue left behind after the builders finish. Start only after major debris is gone and dust has had time to settle, then clean from ceilings to floors with HEPA-filtered equipment, microfiber cloths, and surface-safe products.
- What makes it different: Renovation dust can include drywall gypsum, wood particles, paint residue, and silica from concrete or mortar work. These particles are finer and more abrasive than everyday household dust.
- Why it matters: Dust can settle inside cabinets, vents, light fixtures, window tracks, and newly finished surfaces. It may also keep circulating through your HVAC system.
- What to expect: A contractor may leave the work area “broom-swept,” meaning large debris is removed. Detailed dust removal, sanitizing, and final polishing often require a separate cleanup.
- When to clean: Let airborne dust settle for about 24 to 48 hours after work ends when possible. A final touch-up clean a few days later can catch dust that settles afterward.
A remodel can look complete while a thin, chalky layer of dust still sits in places you cannot easily see. For a busy household, that means the job is not truly done until the space is clean enough to use, safe enough to breathe in, and ready for furniture, kids, and pets.
I am Ginger Whitson, owner and president of Love My Maids, and I have led residential cleaning teams in Arlington and West DFW since 2014. Our experience with deep cleaning, move cleaning, and a deep clean after renovation helps homeowners move from construction mess to a home that feels finished.
Understanding Post-Renovation Dust and Contractor Responsibilities
When the contractors load up their work trucks and drive away in August 2026, the silence in your home feels like a celebration. But as you walk through your newly remodeled space, you notice a hazy white film covering your modern quartz countertops, original hardwood floors, and high-end light fixtures.
Understanding why this mess happens-and who is accountable for clearing it-is the first step toward restoring order and safety in your home.
Why Post-Construction Dust Requires a Deep Clean After Renovation
Many homeowners assume that post-renovation dust is simply regular household dust in larger quantities. In reality, construction dust is fundamentally different in both composition and behavior.
Standard home dust consists mostly of pet dander, fabric fibers, and soil tracked in from outdoors. Post-construction dust, however, is a pulverized blend of:
- Gypsum and Plaster: Drywall cutting and joint compound sanding create ultra-fine, chalky particles that cling tightly to vertical surfaces, ceiling light canisters, and tile grout.
- Wood Dust: Sawing trim, cabinetry, and flooring releases abrasive wood particles that act like sandpaper if dragged across delicate, newly finished surfaces.
- Crystalline Silica Dust: Cutting, drilling, grinding, or sanding materials like concrete, mortar, brick, sandstone, ceramic tile, or engineered stone produces microscopic crystalline silica particles. For more safety context, see OSHA’s respirable crystalline silica overview.
- Paint Residue and Chemical Solvents: Aerosolized paint overspray and dried adhesive fragments attach to glass panes and metal trim.
The physical properties of these particles present major health and maintenance challenges. Airborne silica dust and fine drywall particulates are small enough to pass into deep lung tissue, triggering rhinitis, coughing, or acute asthma flare-ups.
Furthermore, because these particles are sharp and abrasive, dry-wiping them across a freshly painted wall or a new marble island will permanently scratch the finish.
Because fine construction dust can remain suspended in the indoor air for up to 48 hours after active work ceases, attempting a standard quick sweep won’t cut it. To safely clear microscopic particulates without scratching fresh finishes or blowing dust back into the air, you need a specialized deep clean after renovation.
Contractor “Broom-Swept” Standard vs. Homeowner Deep Cleaning
One of the most common points of friction between property owners and general contractors involves the definition of “clean.” Homeowners often expect to walk into a move-in ready, white-glove pristine home the day construction wraps up. However, standard construction contracts tell a very different story.
In the building industry, contractors are generally only bound by the “broom-swept standard.”
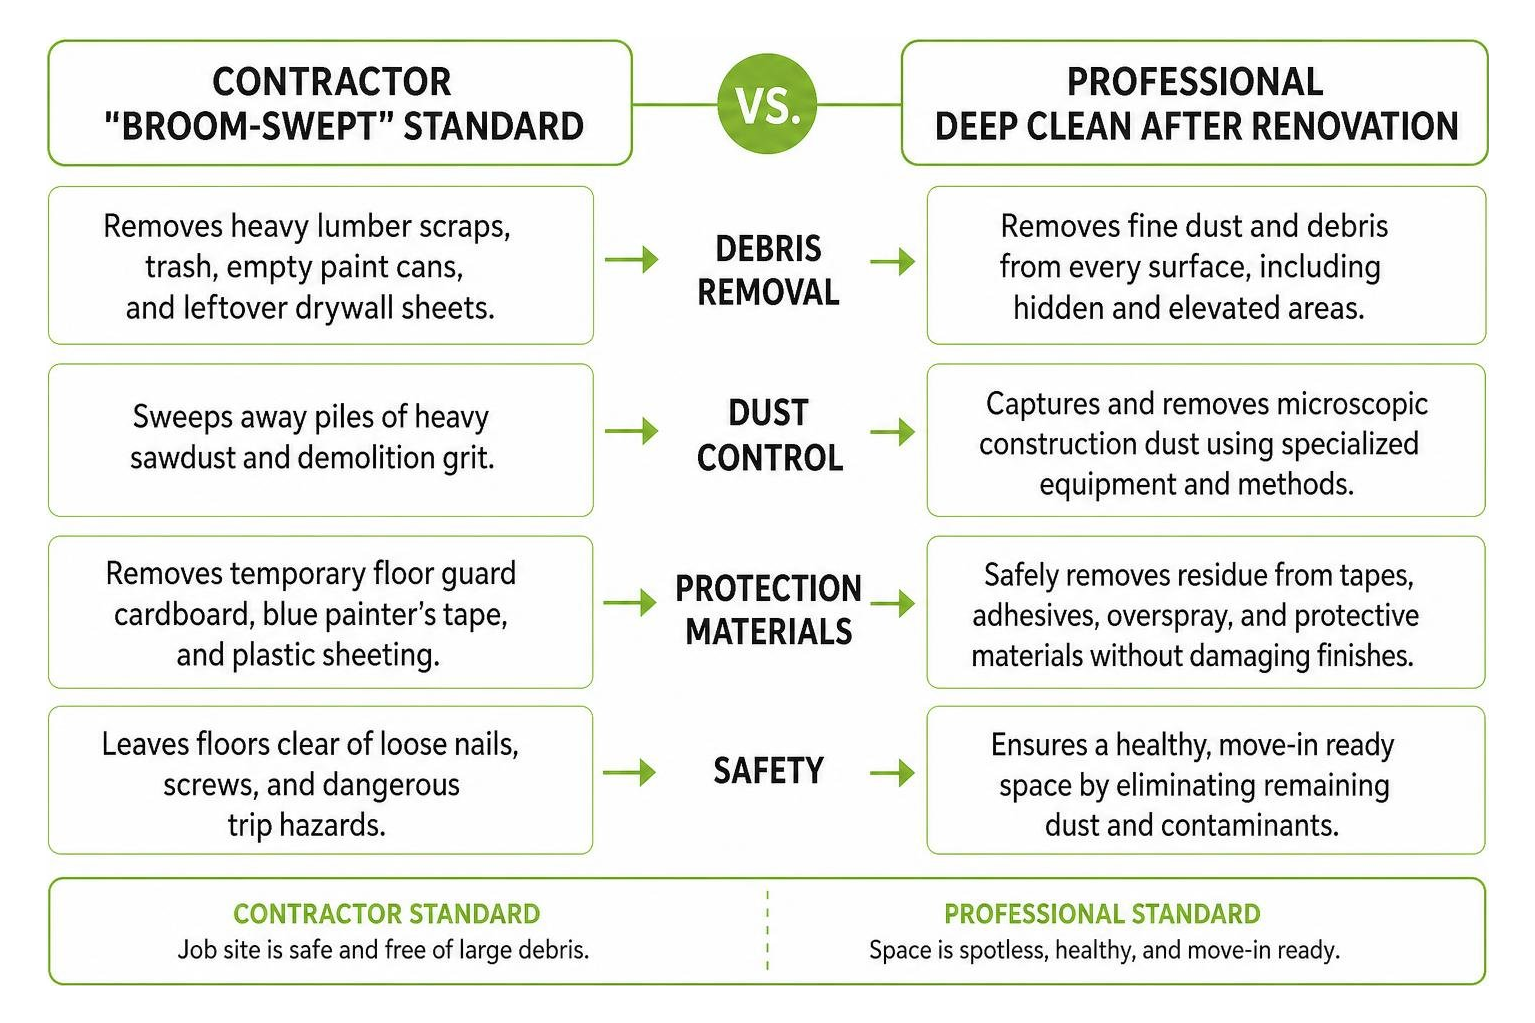
Under a typical broom-swept agreement, your contractor is responsible for:
- Removing heavy lumber scraps, trash, empty paint cans, and leftover drywall sheets.
- Sweeping away piles of heavy sawdust and demolition grit.
- Removing temporary floor guard cardboard, blue painter’s tape, and plastic sheeting.
- Leaving floors clear of loose nails, screws, and dangerous trip hazards.
Contractors do not perform detail-oriented sanitary cleaning. They won’t wipe down the insides of custom soft-close drawers, mop up dull grout haze on bathroom floor tiles, wash window tracks, or run HEPA air scrubbers to purify indoor air.
Unless you specifically negotiate and fund white-glove post-construction cleaning in your primary building agreement, detailed deep cleaning falls squarely on the homeowner. Understanding this distinction saves you from unexpected frustration and helps you plan your timeline and budget accordingly.
The 3 Critical Phases to Deep Clean After Renovation
Attempting to tackle a post-renovation mess in a single, unstructured pass is a recipe for burnout. If you wipe down your floors first and then dust your ceiling fans, falling debris will instantly ruin your hard work.
Professional cleaning crews rely on a proven, sequential process. Dividing the job into three distinct phases guarantees efficiency, protects fresh finishes, and eliminates “phantom dust” that settles days after contractors depart.
Phase 1: The Rough Clean and Debris Removal
The rough clean takes place immediately after major construction work finishes and contractors pack up their heavy tools. The primary goal of Phase 1 is to make the space accessible and safe for detailed cleaning.
Key tasks during Phase 1 include:
- Clearing Remaining Construction Trash: Collect leftover cardboard cartons, plastic packaging, insulation cutoffs, and discarded tape.
- Removing Protective Coverings: Carefully peel up temporary floor runner plastics, cardboard sheets, and protective masking films covering appliances, sinks, and windows. Fold plastic sheets inward so trapped construction grit doesn’t spill onto the floor.
- Scraping Stickers and Excess Compounds: Carefully scrape window brand stickers, paint drips, and excess silicone caulk off glass and non-porous surfaces using plastic scrapers.
- Heavy Wet/Dry Vacuuming: Use a heavy-duty industrial shop vacuum to pull coarse wood chips, plaster chunks, and heavy grit out of room corners, wall junctions, and floor registers.
- The 24 to 48 Hour Dust-Settling Window: Once Phase 1 is complete, stop all active work and wait 24 to 48 hours. Construction dust floats in the air for up to two days. Allowing this floating haze to settle onto physical surfaces before starting Phase 2 prevents endless recleaning.
Phase 2: The Deep Clean and HEPA Dust Extraction
Phase 2 is the most intensive stage of the entire process. This phase addresses the microscopic film coating every wall, baseboard, cabinet interior, light fixture, and floor.

During Phase 2, cleaning teams strictly enforce a top-to-bottom, high-to-low methodology:
- Ceilings, Fixtures, and Upper Walls: Begin at the highest point in the room. Use extendable dust mops wrapped in dry microfiber pads to capture dust on ceilings, crown molding, recessed light canisters, and ceiling fan blades.
- Dry Dusting Before Wet Wiping: Never apply water or wet sprays directly to heavy drywall dust. Mixing liquid with dry sheetrock dust turns the powder into a thick, muddy slurry that smears into paint pores and wood grain. Always vacuum or dry-dust first using electrostatic microfiber cloths.
- HEPA Vacuuming: Vacuum all vertical and horizontal surfaces—including walls, door panels, window sills, and subfloors—using a vacuum equipped with a True HEPA filter.
- Surface Sanitization: Damp-wipe all countertops, cabinet shelves, doors, switch plates, and trim using pH-neutral, non-abrasive cleaning solutions.
If your home was lived in during construction, fine dust inevitably drifted into unrenovated areas. Knowing the 5 Signs Your House Needs Deep Cleaning can help you decide whether your whole house requires HEPA dust extraction.
Phase 3: The Sparkle Clean and Touch-Up Polish
Phase 3—often called the “white-glove reveal”—takes place roughly 48 to 72 hours after Phase 2. This timing window accounts for “phantom dust,” which is the tiny percentage of ultra-light dust particles that remain suspended during Phase 2 and slowly settle over the next few days.
Tasks in Phase 3 focus on visual perfection and shine:
- Glass and Mirror Polishing: Wash interior windows, glass shower doors, and decorative mirrors using specialized glass scrapers, squeegees, and streak-free microfiber cloths to eliminate faint smudges and water spots.
- Buffing Hardwood and Fixtures: Buff custom metal cabinet hardware, stainless steel appliances, chrome faucets, and hardwood floors to restore their full brilliance.
- Grout Haze Removal: Apply pH-balanced tile cleaners to wipe away remaining chalky film on newly grouted bathroom or kitchen tiles.
- Final Floor Pass: Complete a final HEPA vacuuming pass followed by damp-mopping with a micro-thin fiber pad.
Room-by-Room Guide: How to Deep Clean Surfaces and Hidden Dust Traps
Every room in a renovated home presents unique cleaning challenges. Kitchen cabinets hide drywall dust in their soft-close hinges, while bathroom tile grout traps abrasive construction film. Having the right tools and targeted methods makes all the difference.
Essential Tools and Safety Gear for DIY Construction Cleanup
Attempting a deep clean after renovation with standard domestic cleaning supplies will slow you down and can even damage your home or equipment. Before starting, gather professional-grade equipment and Personal Protective Equipment (PPE):
- N95 Respirator Masks: Standard paper dust masks let fine silica and gypsum particles pass through. N95 respirators fit tightly and filter out microscopic particulates to protect your lungs.
- Safety Goggles: Form-fitting, unvented or indirectly vented goggles prevent falling plaster dust from irritating your eyes during ceiling and wall cleaning.
- Heavy-Duty Nitrile or Leather Gloves: Protect your hands from harsh chemical residues, sharp tile scrap metal, and splinters.
- Commercial HEPA Vacuums: Standard household vacuums usually lack sealed HEPA filtration. Fine drywall dust bypasses standard vacuum bags, blowing out through the exhaust back into your living room and quickly burning out consumer vacuum motors. Rent or purchase a heavy-duty shop vacuum equipped with a sealed HEPA filter rated to capture 99.97% of particles down to 0.3 microns.
- Color-Coded Microfiber Cloths and Mops: Microfiber features split fibers that magnetically attract fine particles without scratching surfaces. Color-code your cloths (e.g., blue for glass, green for counters, yellow for bath) to avoid cross-contamination.
- Two-Bucket Mopping System: Use one bucket for clean pH-neutral floor solution and a second bucket with a wringer for dirty rinse water. This prevents you from mopping floors with muddy slurry water.
- pH-Neutral Surface Cleaners: Protect delicate custom stonework, unsealed wood, and fresh paint from harsh acids or bleaching agents.
Having organized cleaning systems is essential. Check out our customizable cleaning Checklists to stay organized during your DIY clean.
Surface Cleaning Protocols: Walls, Hardwood, Tile, and Windows
Different building materials react differently to post-construction cleanup methods. Here is how to clean primary surfaces safely:
Drywall and Painted Walls
Drywall dust clings strongly to latex paint via static charge. Never start by scrubbing walls with a wet sponge. Instead, wrap a clean microfiber cloth around the head of a flat dust mop (or a broom handle) and wipe walls from ceiling to floor in vertical strokes. Once the dry dust is captured, go over stubborn spots with a barely damp, wrung-out microfiber pad.
Hardwood and Laminate Flooring
Grit left on hardwood acts like sandpaper under shoe heels. Vacuum floors thoroughly using a floor brush attachment (never use a vacuum with a rotating beater bar, which can scratch delicate wood coatings). Follow up using the two-bucket mopping method with a soft, well-wrung microfiber mop head. Avoid over-wetting hardwood or laminate, as standing water causes wood planks to swell and buckle at the seams.
Tile and Natural Stone
Tile installers often leave a hazy white residue called “grout haze” across newly laid porcelain, ceramic, or marble tiles. For ceramic and porcelain, use a commercial grout haze remover or a mild vinegar-and-water solution (1 cup white vinegar per gallon of warm water).
Warning: Never use acidic solutions or vinegar on natural stone like marble, limestone, or travertine, as acid causes permanent chemical etching. Use a pH-neutral stone cleaner and a soft nylon scrub pad instead.
Glass Windows and Mirrors
Paint overspray, wood stain splatters, and silicone caulk line window glass after construction. Spray windows with a professional ammonia-free glass cleaner. For stubborn paint spots, hold a fresh razor blade at a flat 45-degree angle against wet glass and gently slide it under the paint splatter. Wipe clean with a lint-free microfiber cloth.
Uncovering Hidden Dust Traps Before They Recirculate
The reason construction dust seems to linger for months after a remodel is that fine powder hides in architectural crevices that standard cleaning overlooks. For a complete deep clean, make sure to detail these hidden dust traps:
- Inside Cabinet Interiors and Soft-Close Tracks: Open every newly installed kitchen cabinet and bathroom vanity drawer. Vacuum the interior box corners, then wipe down the metal drawer slides and soft-close tracks where fine wood dust gathers.
- Door Frame Tops and Baseboard Ledges: The top edge of interior door frames, window casings, and tall decorative baseboards collect thick layers of falling plaster dust.
- Recessed Lighting Canisters: Turn off electricity at the breaker panel and carefully wipe inside recessed ceiling light housings where heat and static pull airborne dust upward.
- Radiator Covers and HVAC Covers: Remove register grilles and radiator covers. Vacuum and wash behind structural covers where residual sheetrock dust hides.
- Architectural Reveals and Valances: Modern interior designs feature shadow-line reveals, baseboard gaps, and hidden curtain valances that capture drifting dust.
Protecting Air Quality: HVAC Filters, Ducts, and Ventilation Strategy
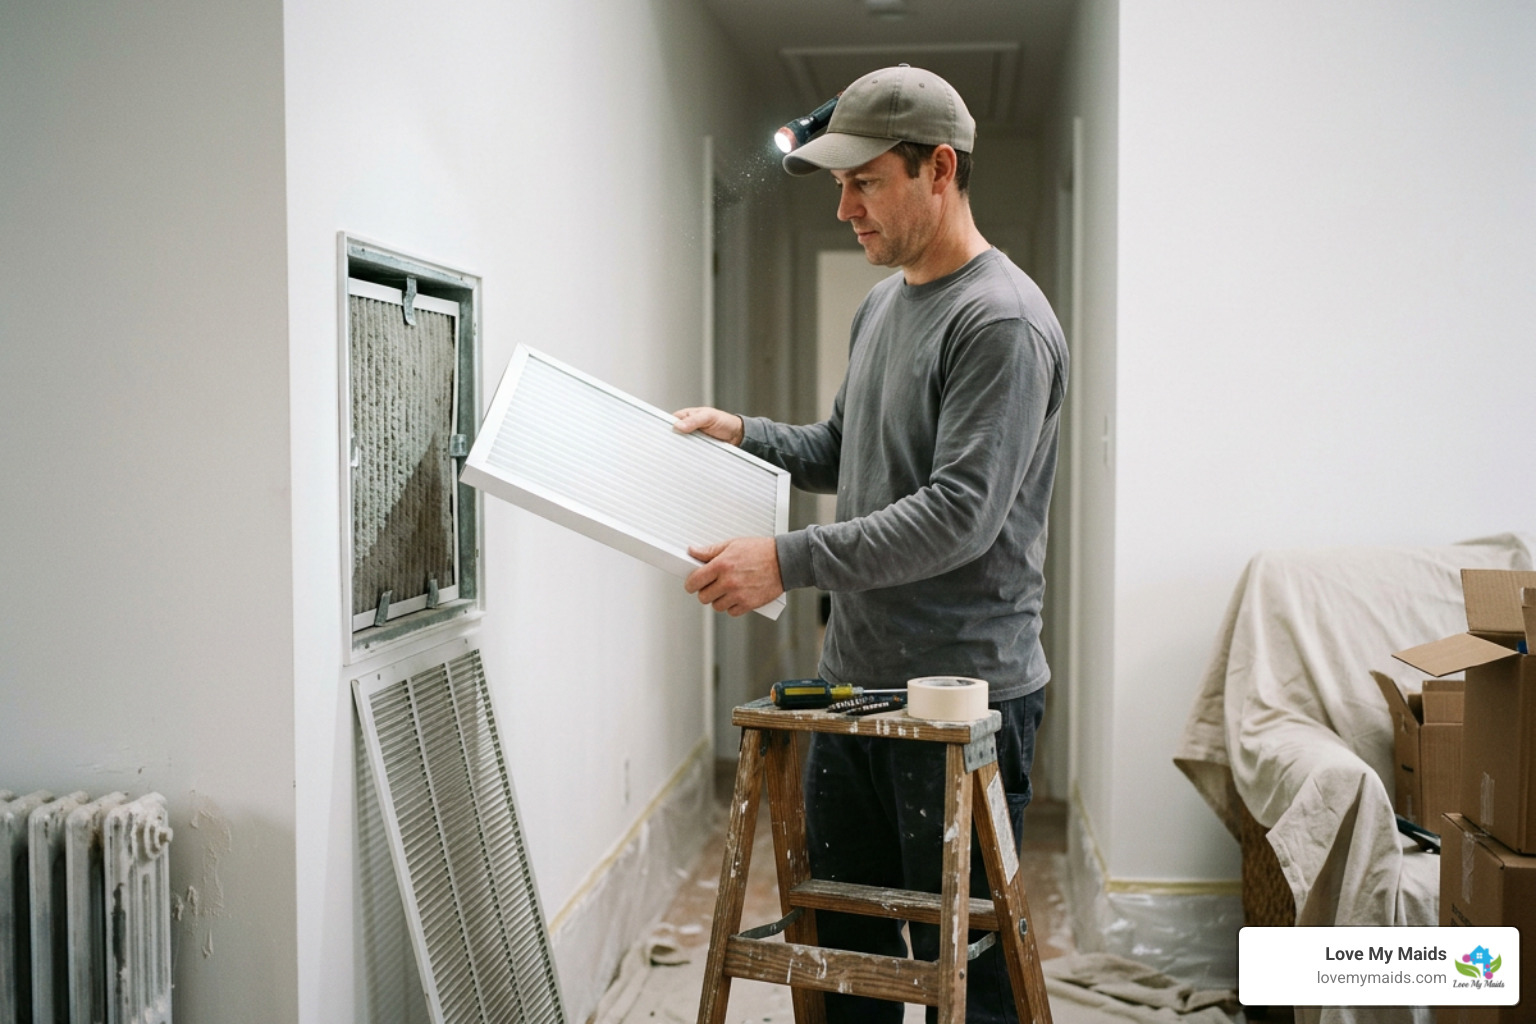
A thorough deep clean after renovation requires equal attention to the air you breathe. During a major indoor remodel, your home’s central heating and cooling system acts like a giant vacuum, drawing airborne drywall dust and sawdust directly into return vents and circulating it across every room in your home.
Replacing HVAC Filters and Cleaning Return Air Vents
Even if contractors tried to block off return vents with plastic sheeting during construction, microscopic dust particles always find a way into your HVAC ductwork. Restoring healthy indoor air quality requires a strict filter and vent protocol:
- Immediate Post-Construction Filter Swap: As soon as active construction wraps up, turn off your system and pull out the working air filter. You will likely find it thick with white sheetrock powder. Dispose of it immediately.
- Upgrade to MERV 11-13 Filters: Standard basic air filters (MERV 1 to 4) capture large lint, but let fine drywall and silica dust pass right through. Upgrade to a pleated filter rated MERV 11 to MERV 13. These filters capture microscopic particles down to 0.3 microns, protecting your blower motor and indoor air quality.
- Follow the 30-Day Follow-Up Rule: Because lingering dust settles over the first month, replace your HVAC filter again exactly 30 days after your initial deep clean.
- Wash Return Vents and Grilles: Unscrew metal or plastic return air vent covers. Wash them thoroughly in warm, soapy sink water, dry them completely, and vacuum inside the accessible duct opening before reinstalling them.
- Evaluate Professional Duct Cleaning: If contractors ran your heating or air conditioning system during heavy drywall sanding or tile cutting without protective filter covers, hire a professional air duct cleaning service to mechanically sweep and vacuum your main supply and return trunks.
| Filter Grade | Particle Capture Capabilities | Construction Dust Performance | Recommended Usage |
|---|---|---|---|
| MERV 1 – 4 | Captures carpet fibers, pollen, lint (> 10.0 microns) | Poor: Sheetrock & silica dust pass right through | Standard off-season rental baseline |
| MERV 8 | Captures dust mites, mold spores, cement dust (3.0 – 10.0 microns) | Fair: Traps heavy sawdust, misses fine gypsum | Normal monthly routine maintenance |
| MERV 11 – 13 | Captures silica dust, drywall powder, auto emissions (0.3 – 3.0 microns) | Excellent: Traps microscopic post-renovation dust | Mandatory post-renovation standard |
Cleaning fine construction dust out of air vents and living spaces delivers benefits far beyond surface appearance. Discover how deep cleaning improves indoor air quality in our article on The Power of Deep Cleaning to Transform.
DIY vs. Professional Service: When to Call the Experts
Deciding whether to perform a DIY post-renovation cleanup or bring in professional cleaning technicians comes down to evaluating three main factors: physical labor time, available specialized gear, and home size.
Evaluating Labor Time, Equipment Costs, and Home Size
Industry data shows that post-construction cleaning is roughly 3 to 5 times more labor-intensive than standard residential cleaning.
Consider these practical benchmarks when making your decision:
- The 40-Hour Threshold: Thoroughly deep cleaning a 1,500 to 2,500 square foot home after a major remodel typically takes over 40 hours of intense physical labor for an individual.
- Single-Room vs. Whole-House Scope: A single powder room or small bedroom remodel requires 4 to 8 hours of focused DIY effort. In contrast, a whole-home renovation or full kitchen overhauls often require 2 to 3 full days of multi-person teamwork.
- Specialized Equipment Investment: Buying or renting commercial HEPA vacuums, telescoping extension poles, microfiber wall mops, PPE, and non-abrasive chemical removers can cost anywhere from $200 to over $500.
- Risk to High-End Finishes: Accidentally scratching new custom hardwoods or etching expensive natural marble tops with improper products can quickly turn a DIY cost-saving attempt into a costly repair bill.
Step-by-Step Checklist to Deep Clean After Renovation
If you decide to take on the project yourself, follow this systematic workflow to ensure complete coverage:
[ ] Preparation & Safety
- [ ] Put on N95 respirator mask, safety goggles, and heavy-duty gloves.
- [ ] Turn off HVAC unit to prevent air circulation during heavy dusting.
- [ ] Gather commercial HEPA vacuum, microfiber cloths, wringer mops, and pH-neutral cleaners.
[ ] Phase 1: Rough Clean (Days 1)
- [ ] Collect and throw out large debris, trash, cardboard, and protective sheeting.
- [ ] Scrape painter’s tape, labels, and paint splatters from glass windows using razor scrapers.
- [ ] Vacuum heavy wood chips and debris using wet/dry shop vac.
- [ ] WAIT 24-48 HOURS to allow floating air particles to settle.
[ ] Phase 2: Deep HEPA Clean (Days 2-3)
- [ ] Dry-dust ceilings, crown moldings, overhead fans, and light fixtures working high-to-low.
- [ ] Dry-wipe painted walls using microfiber dust mop on extension pole.
- [ ] Vacuum inside all new kitchen and bathroom cabinets, drawers, and soft-close tracks.
- [ ] Damp-wipe cabinet doors, door frames, switch plates, and interior trim.
- [ ] HEPA-vacuum subfloors, carpets, and hard floors.
- [ ] Wash window glass, frames, and sills.
- [ ] Mop hard floors twice using two-bucket system and pH-neutral floor cleaner.
[ ] Phase 3: Touch-Up Polish & Air Care (Days 4-5)
- [ ] Replace HVAC furnace air filter with MERV 11-13 rated filter.
- [ ] Unscrew and wash return air grilles.
- [ ] Wipe away grout haze on freshly tiled surfaces using pH-neutral solutions.
- [ ] Polish stainless steel appliances, chrome plumbing fixtures, and glass mirrors.
- [ ] Complete final HEPA floor vacuum and micro-fiber damp polish.
When home renovations wrap up and life gets busy, managing a 40-hour cleanup on your own can feel overwhelming. If you prefer to step straight into a spotless home without the physical strain, our professional Deep Cleaning Service or specialized Move Cleaning Service delivers white-glove results backed by commercial HEPA technology.
Frequently Asked Questions About Post-Renovation Cleaning
How long after construction finishes should you wait to deep clean?
You should wait at least 24 to 48 hours after all active construction, drywall sanding, and painting wrap up before starting your primary deep clean. Construction dust particles are lightweight and stay suspended in indoor air for up to two days.
If you clean immediately, dust floating overhead will settle back down onto your freshly cleaned counters and floors overnight. For best results, execute your primary deep clean after 24-48 hours, and schedule a final sparkle touch-up 48 to 72 hours later to capture any remaining “phantom dust.”
Can I use my standard household vacuum to clean sheetrock dust?
No, you should never use a standard household vacuum to clean sheetrock dust or fine concrete dust. Consumer vacuums lack sealed industrial HEPA filtration systems. Ultra-fine sheetrock powder easily bypasses standard vacuum bags and filters, blowing out through the exhaust back into your home’s air.
Even worse, dry sheetrock dust clogs consumer motors instantly, causing the engine to overheat and burn out. Always use an industrial wet/dry shop vacuum equipped with a certified True HEPA filter capable of capturing particles down to 0.3 microns.
Will post-renovation deep cleaning eliminate paint fumes and chemical smells?
A post-renovation deep clean significantly reduces paint fumes and chemical odors by physically removing the sources—such as adhesive residues, aerosolized paint overspray film, and chemical-laden dust particles.
However, newly applied paints, varnishes, sealants, and carpets off-gas volatile organic compounds (VOCs) naturally over time. To eliminate lingering chemical odors, combine your deep clean with continuous ventilation: open windows where weather permits, run HEPA air purifiers continuously, and maintain fresh MERV 11-13 HVAC filters.
Conclusion
Transforming your home through remodeling is an exciting milestone, but the process isn’t truly complete until you eliminate the hidden layer of post-construction dust left behind.
By understanding the abrasive nature of drywall and silica dust, respecting the 24-to-48-hour dust settling window, following a high-to-low methodology, and protecting your HVAC unit with proper MERV 11-13 filtration, you can safely turn a dusty job site into a healthy, sparkling sanctuary.
Whether you tackle the job yourself with heavy-duty HEPA equipment or prefer to hand the heavy lifting over to trusted local professionals, taking the time to deep clean after renovation protects your investment and restores healthy air quality to your living space.
At Love My Maids, our team of professionally trained, background-checked W-2 employee cleaners takes pride in helping families throughout Arlington, Fort Worth, and the surrounding communities enjoy pristine homes.
If you are looking for trusted House Cleaning Fort Worth TX services, expert post-renovation cleanup, or hassle-free Recurring Maid Services, we back every clean with our 24-hour satisfaction guarantee. Browse our Frequently Asked Questions or Contact us today to request a free quote and turn your renovation vision into a sparkling reality!